I saw some examples of beautiful yarn paintings awhile ago and thought it would be fun to give it a try with my 7 year old. After all, how hard could it be? It’s just yarn and glue right?
[insert smirk here]
Maybe it was just us, but our attempts usually ended up in gluey-yarn messes and lots of tears. Then it dawned on me - waxed yarn would be a better alternative (at least at this stage). It’s already sticky, it’s easy to work with and if we made mistakes, we could easily pull pieces off to reshape them. It worked great!
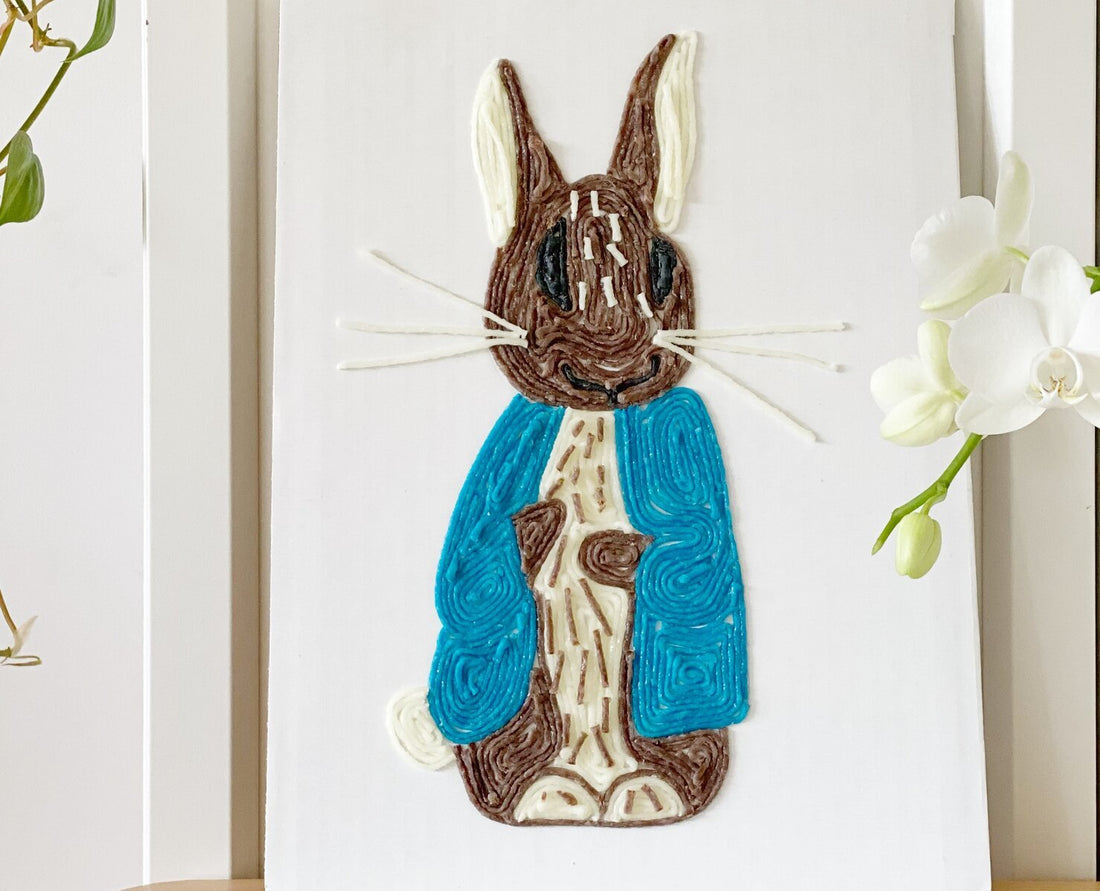
For our project, we pulled from our big stash of Wikki Stix. This gave us plenty of color options to choose from and meant we had plenty to let little sister join in the fun too. We drew a silhouette of Peter Rabbit to work from, but this would be a great project to try out all kinds of designs!

Gather supplies:
-
Wikki Stix
-
Cardboard (we like using the white cake boards you can buy in the cake decorating / craft section at Walmart or your local craft store. They usually have rounded corners and give projects like this a more finished look)
-
pencil
-
scissors
Steps:
-
Start by sketching out your design. Keep it as simple as you can to start (think: coloring book page), you can always fill in more later.
-
Use your Wikki stix to outline the outer edges.
-
Fill in the rest of the picture by bending stix into place. Use scissors to trim where needed.
-
For a more blended effect, try cutting smaller pieces of desired colors and pressing them together.


I’m happy to say, there were no tears this time around, yay!! Wikki Stix are now comfortably in my list of easy, mess-free art supplies and I plan to rotate them in regularly.

Here’s my top 10 go-to supplies. These make great Easter basket stuffers!
-
Watercolor With Me instructional books (meant for painting inside the book itself)
What did I miss? What’s worked well for your family?